

Pop Bottle Hanging Planter – Upside Down
One type of pop bottle planter that has become more popular recently is what I call the upside-down planter. 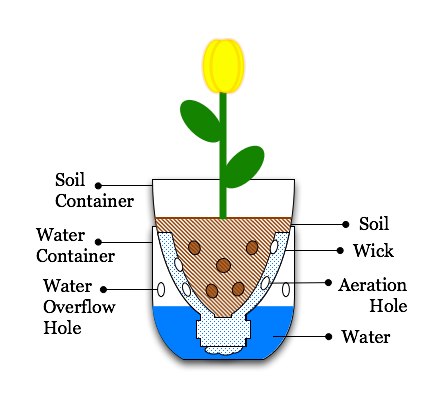 It is fairly simple to make and ensures plenty of water for the plant.
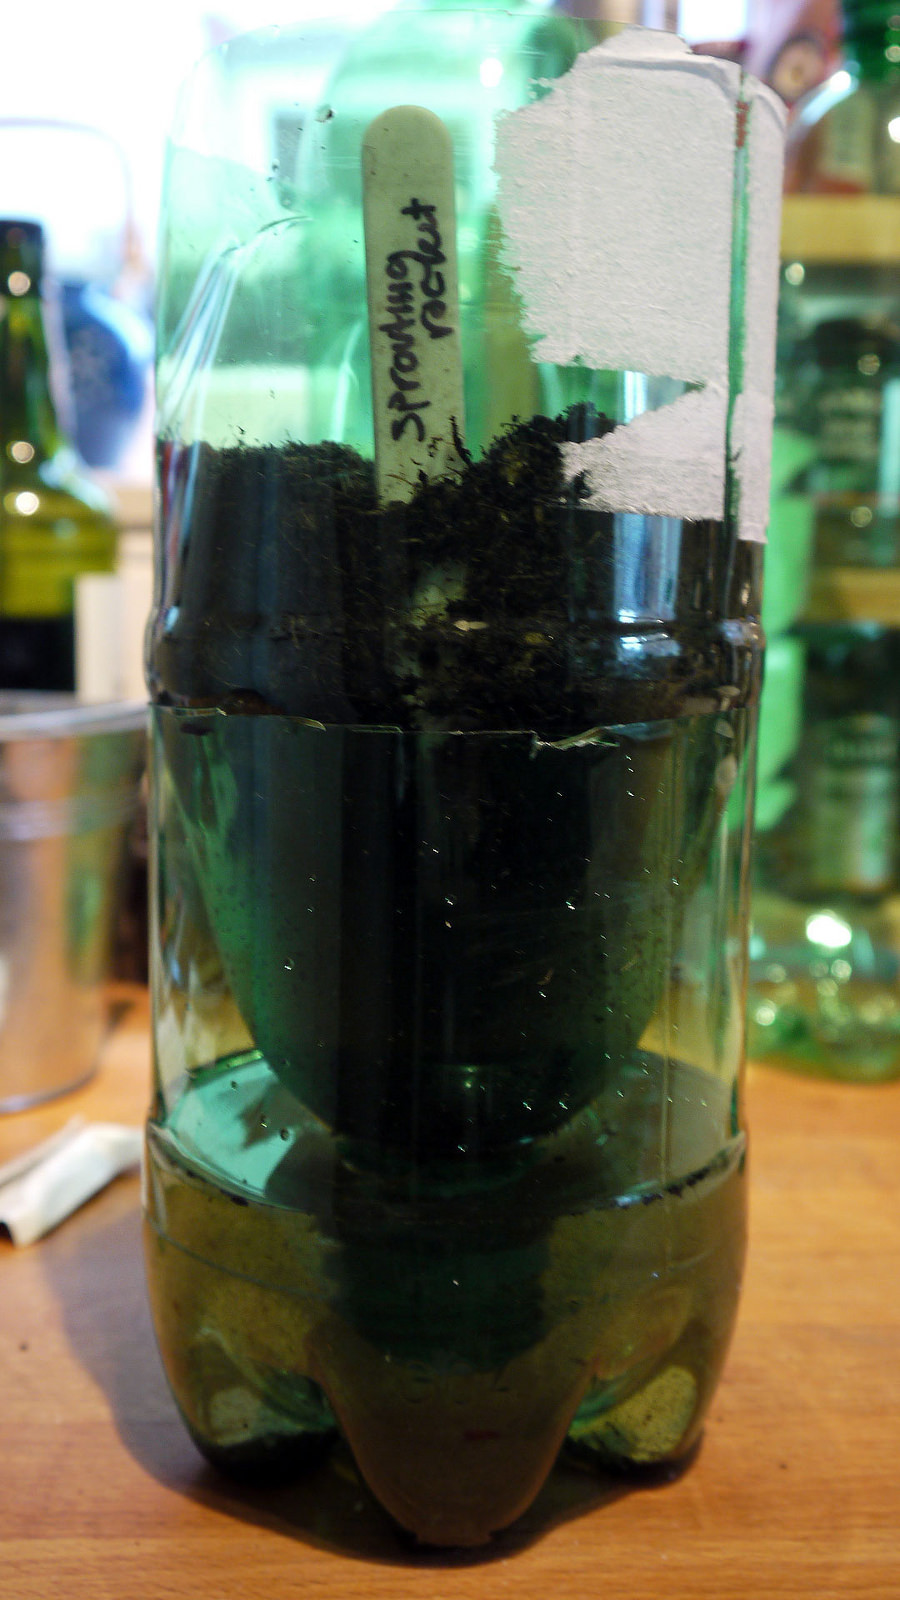
To make this type of recycled planter, all you need is an empty and clean 2-liter soda bottle, a ruler, a pair of sharp scissors or a craft knife, and batting material, which can be found at many craft stores. You could even use a cotton rag instead of batting to act as the wick.
First, measure about 7 inches from the bottom of the bottle and cut the bottle into two pieces. This distance can vary depending on whether you want more room for the plant to grow or a taller planter and more water.
Cut several tiny holes all around the top half of the bottle; this will allow adequate aeration of the plant. Finally, drill a ¼ inch hole in the cap and stuff batting material into the neck, then screw the cap on and thread batting material through it. This will allow water to enter the soil and keep the plant alive. In fact, the plants are self-watering; you only need to add water when you notice the reservoir in the bottom half is depleted.
With your soda bottle planter set up, all you need to do is put some water into the bottom half, place the top half neck-down into the bottom half, and put in soil and some seeds, resulting in a cool and easy planter]!
If you want to hang this planter to make a vertical garden or wall garden, all you need in addition to the above materials is some hanging wire; after cutting two small holes near the top of the planter, you can put the wire through these holes and hang the planter. Just make sure it’s stable so the soil doesn’t spill.
Pop Bottle Hanging Planter – Sideways
Another method for recycled gardening is making a vertical garden from sideways bottles. This option is possibly even simpler than the upside-down method, but does require watering more often.
Sideways pop bottle planters can be made from either 1-liter or 2-liter soda bottles depending on the size of the desired garden. To make these planters, all you need is a craft knife or some sharp scissors and hanging wire in addition to clean bottles.
Leaving the cap on, simply cut out a long rectangle from the bottle. After completely removing the rectangle, hang the bottle, making sure that the planter’s position is stable enough that it will not tilt and spill the soil.

The picture below is a great example of how to hang the bottles in a beautiful yet simple way with just some wire or string. Then you can add the soil and seeds, again making sure that it will not spill.
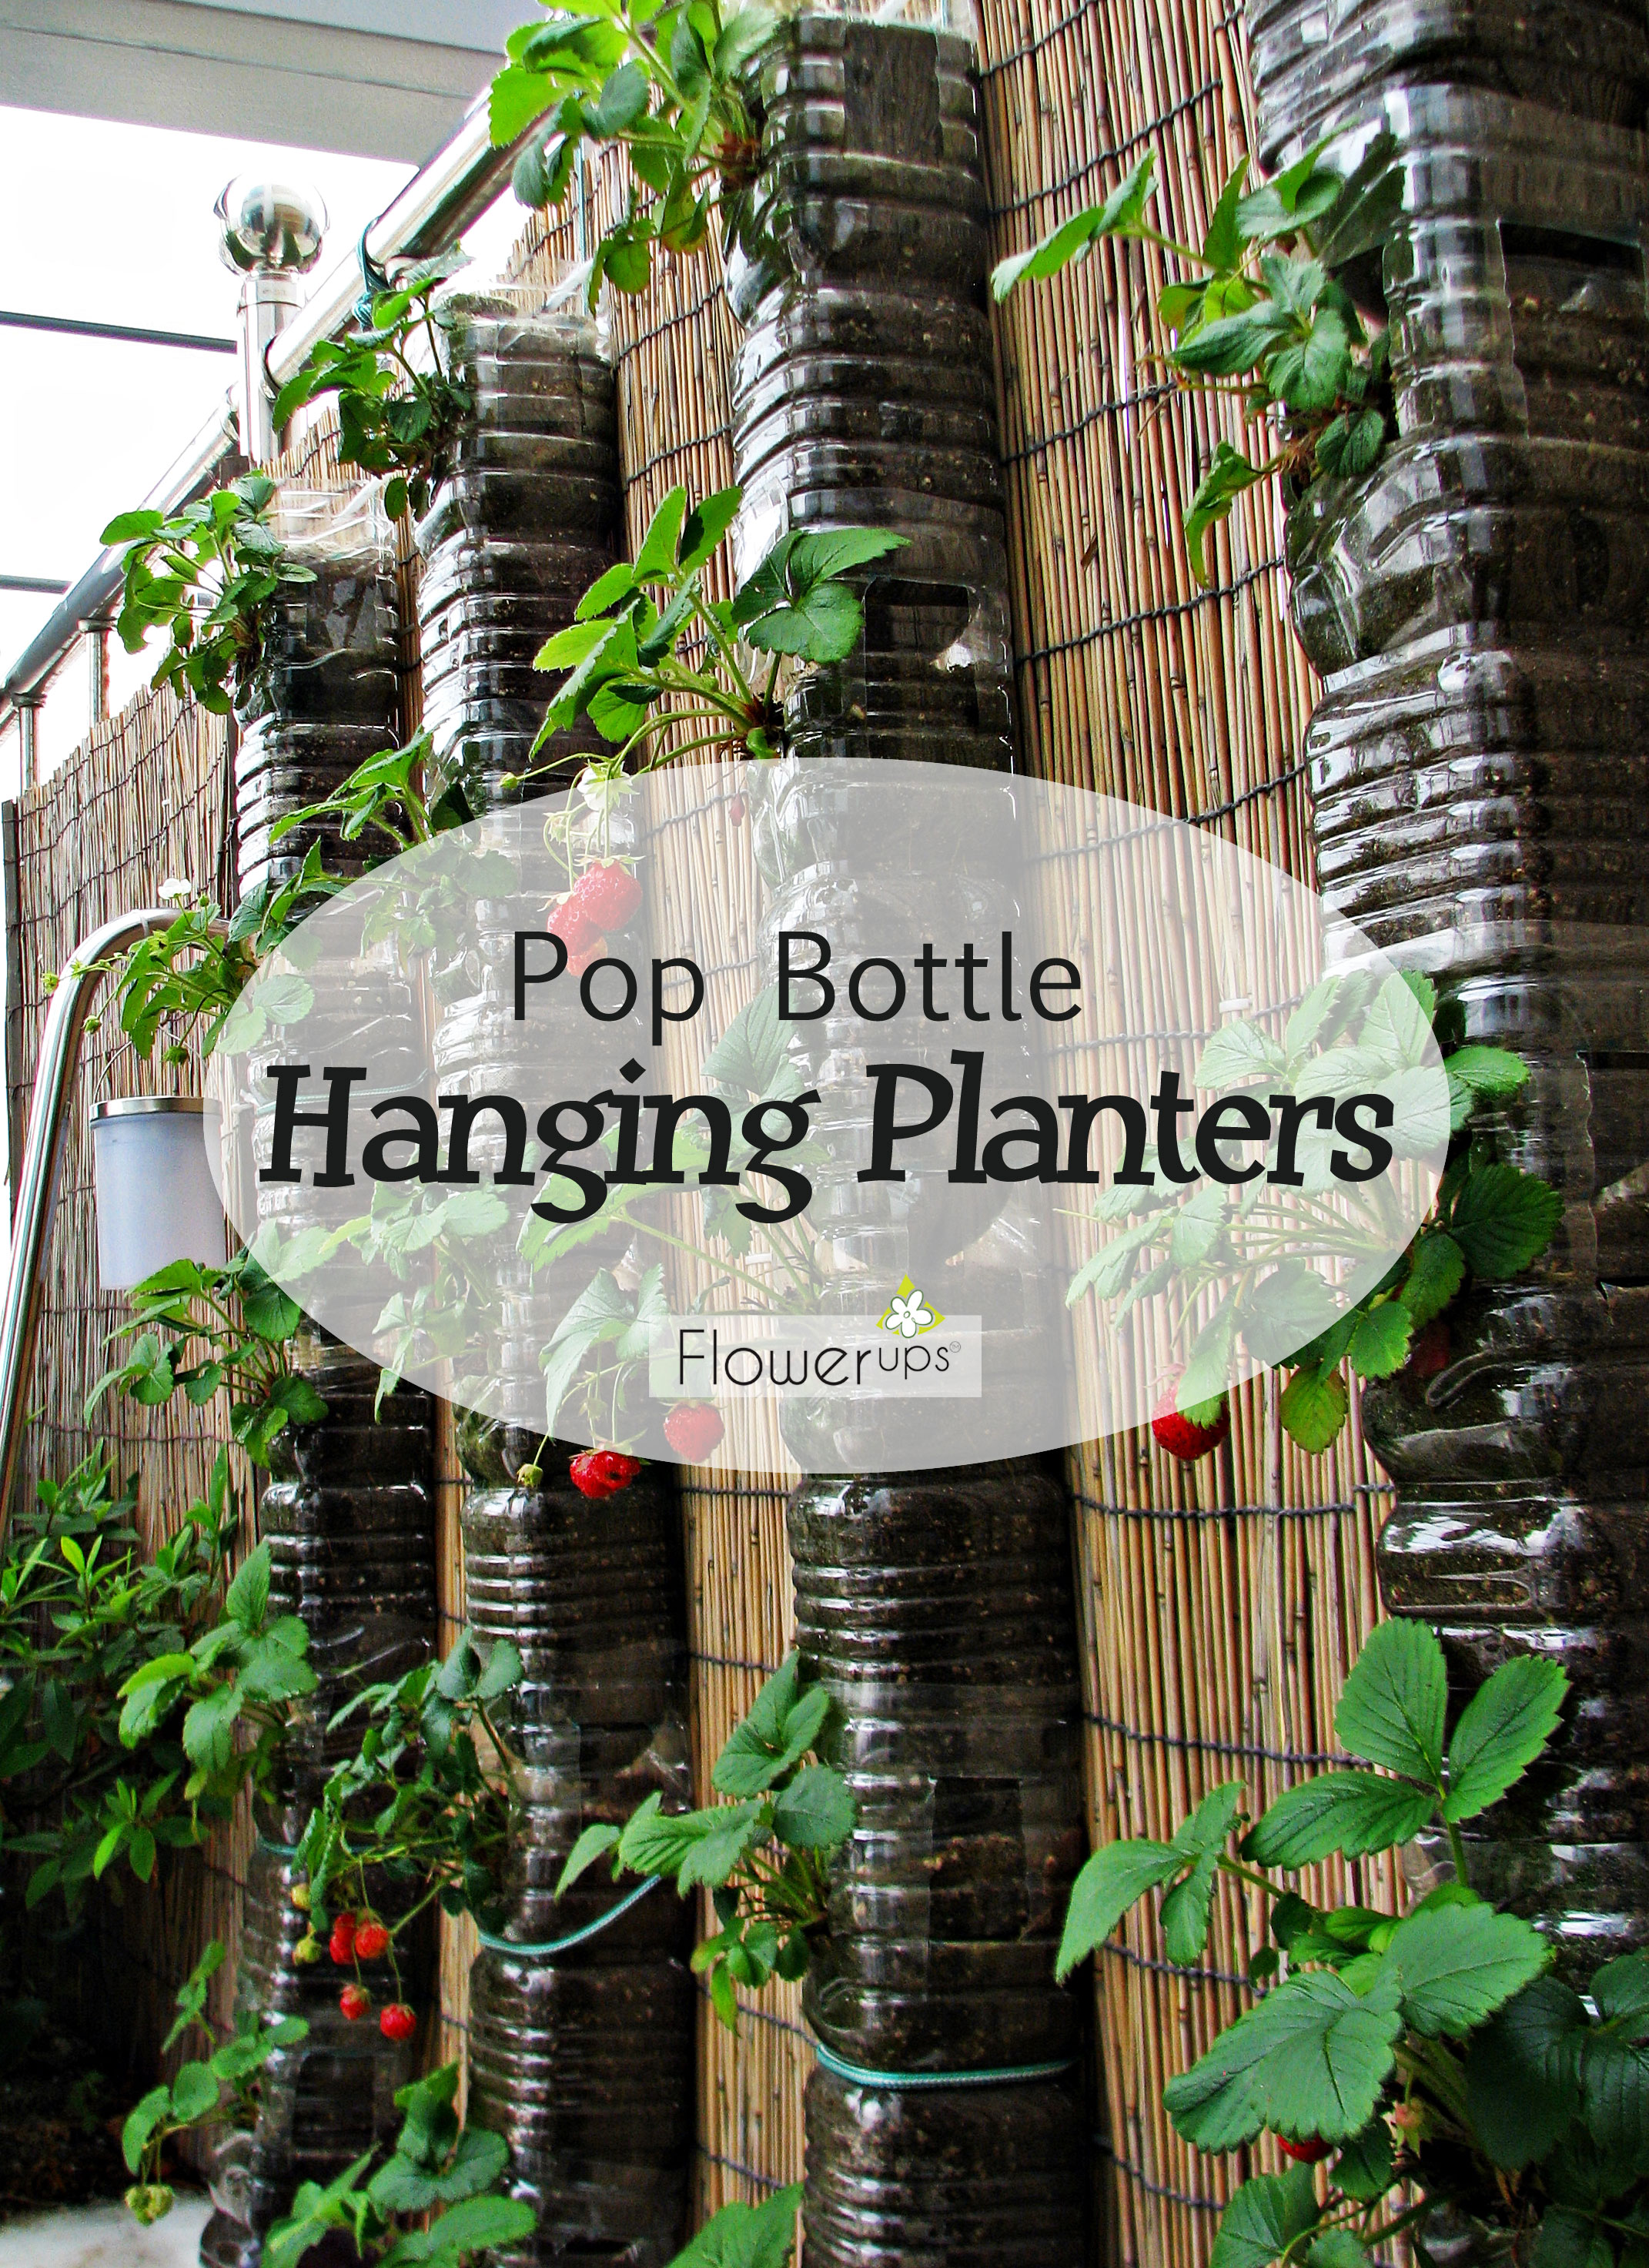
Pop Bottle Hanging Planter – Large Scale Upside-Down
If you’re looking for something more impressive and large-scale than using 1-liter bottles, then the large-scale upside-down approach could be right for you. Rather than using smaller bottles, this method uses large bottles, like punch or cranberry juice bottles.
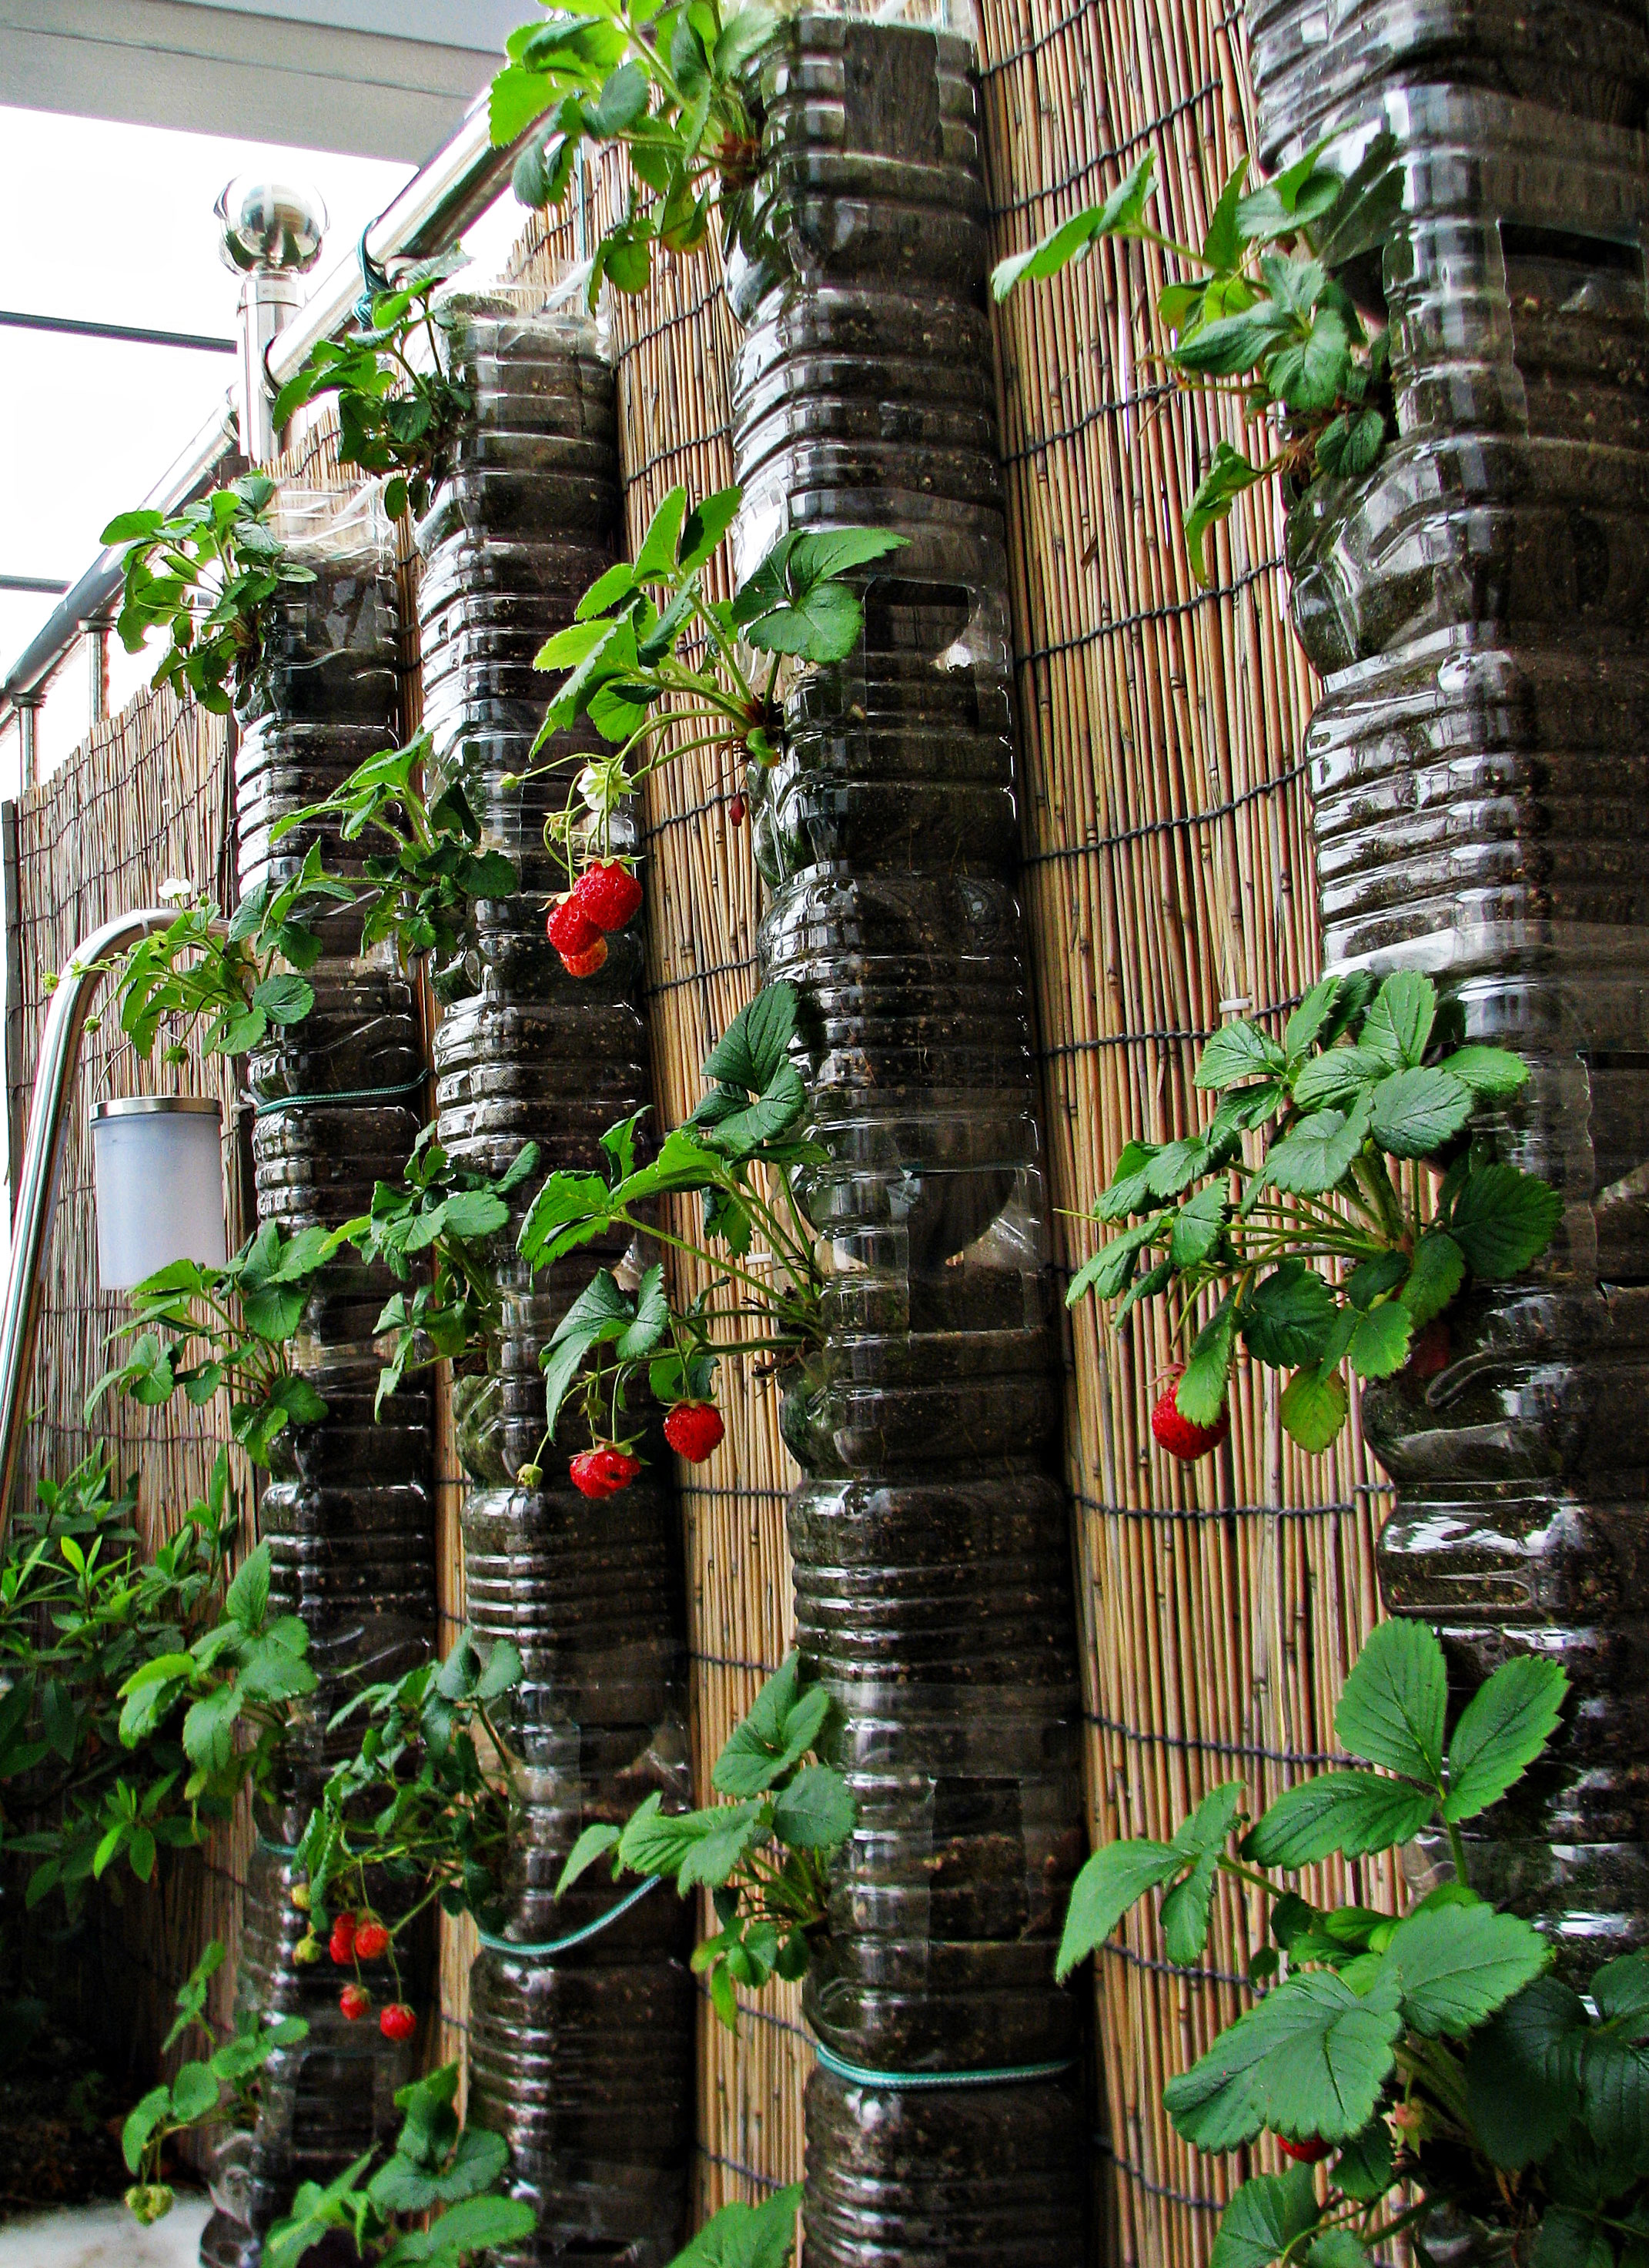
For an even larger garden, water jugs, like the ones that fit into office water bubblers, can also be used for this method. While this approach does require more work than the previous ones, the payoff is a practical and elegant way to grow larger gardens in a very small space with little square footage.
The first thing you need to do to set up this type of garden is to cut the bottoms of the bottles off, similarly to the upside-down method. Next, cut a small rectangle close to the bottom of each bottle.
Then, begin from the bottom up. Put some soil and some seeds into the bottom of the lowest bottle, making sure to fill it up only to the rectangle, then insert the next bottle neck-down into the soil. To ensure stability of the tower, one good method is to use metal or plastic strapping around the bottles, and then screw the ends of the strapping into the vertical structure behind the garden.
Continue filling bottles until you reach the desired height. Make sure to secure the tower to the structure. While it will take a good deal of effort to set up these planters, the finished product will be a glorious display of creativity, and to make matters easier, each bottle now has its own watering port due to the rectangular holes!
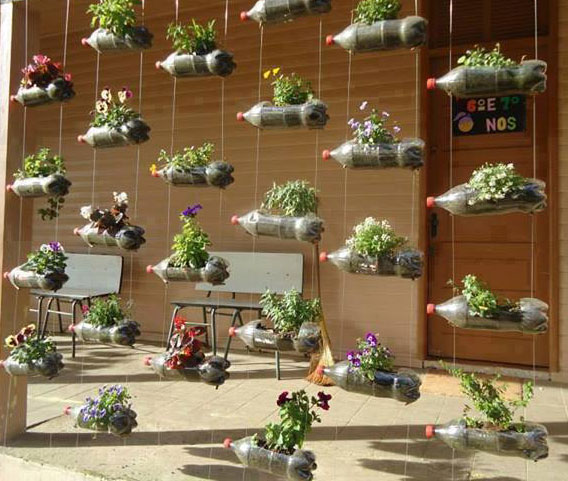
Pop Bottle Vertical Garden – Vertically hanging Bottles
Finally, the vertical method of making and using pop bottle planters is yet another fun and simple way to make a cool living wall.
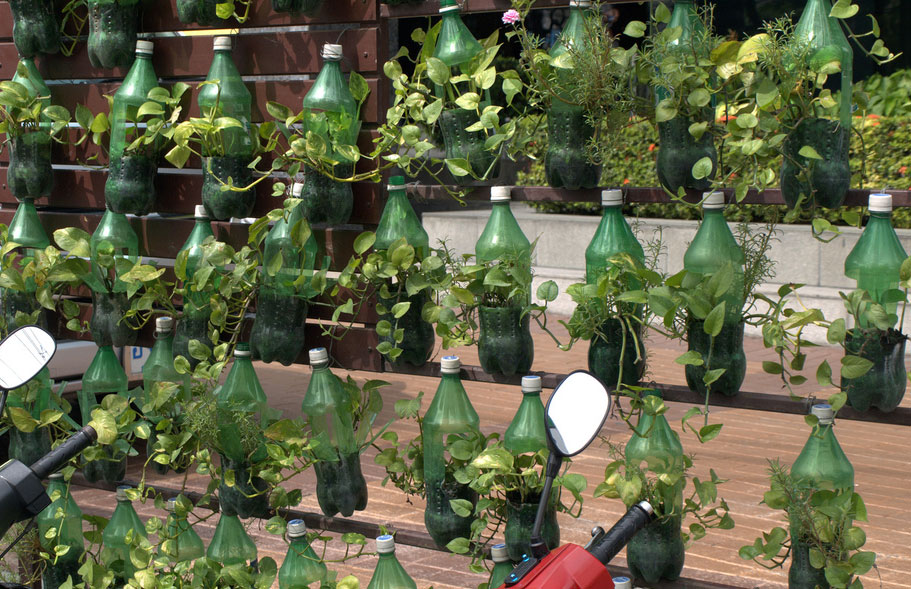
Making vertical recycled gardens is very similar to the horizontal method; all you need to do is cut out a rectangle of plastic from each bottle. However, in this case, instead of hanging the bottle sideways, you stand the bottle up and put soil into the bottom.
If you do use this method, I would recommend cutting the rectangle out slightly higher than in the horizontal method to make sure there’s plenty of room for soil. To hang this type of bottle planter, just punch some holes into the neck of the bottle and hang it with wire, making sure that the bottle is stable so that the soil does not spill.
This is another easy but good-looking way to create planters from recycled pop bottles.
These four methods of soda bottle gardening are some of the most common and most beautiful ways to design vertical gardens from recycled material. With the right materials and some time, you could make these gardens too! Good luck and have fun!
